
With the work at Bedford Park and BP Yard winding down it's time for me to turn my attention to Terminal Yard. When I started building the N.Y.C.T.L. Terminal Yard was built to be a staging or fiddle yard. It's in a separate room that houses the vast majority of my trains and was basically designed as a place for me to take trains out of their boxes and put them on the layout and take trains off the layout and put them away. I never envisioned adding scenery here and was quite happy with the painted plywood and train boxes.
Fast forward several years and Terminal Yard has become a focal point of N.Y.C.T.L. operations. Operations that did not exist at the time it was built. This all changed when I met my friend Ralph or PC Ralph as we call him and we started the virtual ops AKA the Penn Central Car Movements. Then 1:1 Engineer Ed started coming over for actual ops and Terminal Yard was again part of the action that I never really envisioned for it. Add 1:1 Sir Neal's A.P.R.R. into the virtual ops mix and it was really time for me to get Terminal Yard more virtual ops and actual ops worthy.
Recently Ralph showcased some of his facade industries on his K.P.D. blog and another train buddy, John Bruce of the L.F.N.W., showcased his facade layout on his blog. Using both of their work as inspiration I entered into the 'facade world'.
Awhile back my buddy Engineer Ed gave me an Evans Designs software package that allows me to make my own backdrop or facade buildings using my computer and printer. So I put it to use again.
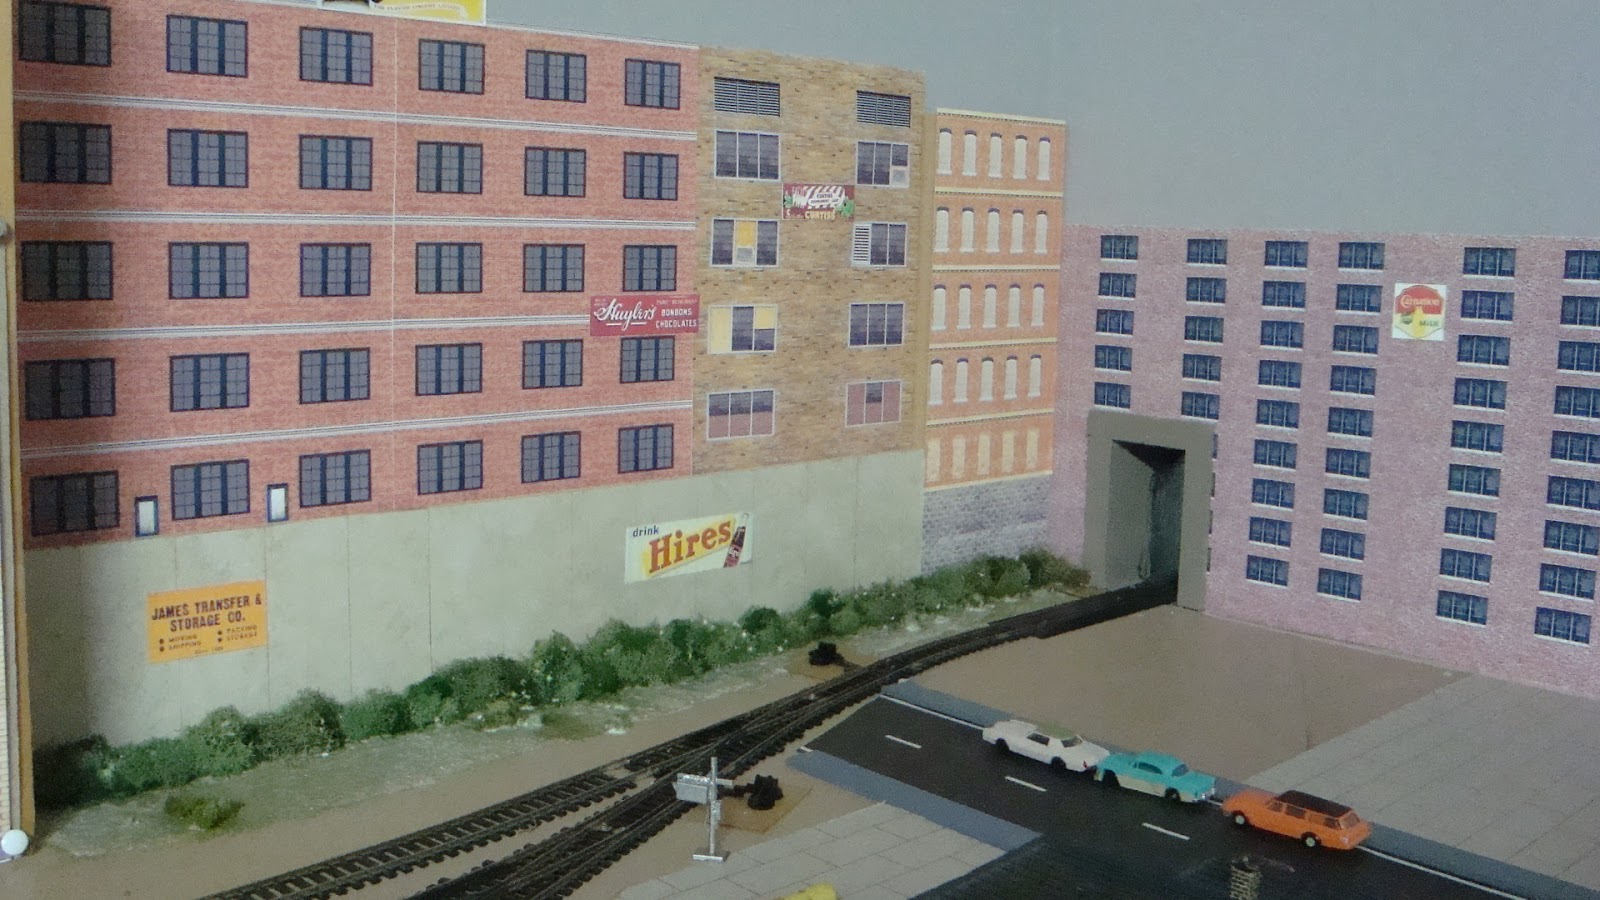
This is the Terminal Yard entrance at it's recent best in P.C.C.M. 39. Evans Designs printed building are in the upper right corner. Some cardboard and hard board are blocking the train boxes behind the trains. The yard was tough to find decent photo ops when participating in the virtual ops.


I want to thank all of my train pals for their inspiration, support, positive comments and camaraderie. There is no way I would have ever undertaken this without that. I am so looking forward to posting some shots of trains entering and leaving the Yard now! Thanks for all your support.
Thanks for reading!
PS I unglued the turnout!
What a difference!!! Looks great! The facades and scenic treatments really add character and interest to the Terminal Yard area. Clever idea to Velcro them for easy access to storage behind!
ReplyDeleteThanks for the compliments and the inspiration Ralph! You know what they say about Velcro...What a rip off! It's working well so far...
DeleteThat entire area looks superb! Who would know what's behind the facade. You made that entire area come alive. Keep it going!
ReplyDeleteThanks for the compliments Sir Neal!
DeleteTalk about a transformation ! Those facades look terrific. Nice touch having the retaining wall. Gives the facades more dimension to their look. There is so much going on in the terminal yard now I could spend an entire session in that room. BTW, I am so happy that you glued a switch, because I also did the same thing except that mine is still glued shut. Nice to know that even happens to the experts. Great choice for ballast, it looks very realistic.
ReplyDeleteThanks for the compliments Engineer Ed! Hopefully before long we'll have that day where we just work Terminal Yard.
DeleteThe diluted glue has the tendency to seep where you don't want it to go. I used a couple of drops of Goo Gone, a citrus product, on the switch points and let it seep under neath the throw rod. After fooling around with it off and on it finally became unstuck and is working fine now.
A good way to prevent glue mishaps is to spray the switch with WD40 before you add the glue. I've never had a problem with this.
ReplyDeleteGood tip John. I'll be using this going forward. Thanks!
DeleteJohn, your work at Terminal Yard is fantastic!!! The new buildings, facades and scenery really complete the scene. Can't wait to see part 2!
ReplyDeleteThanks for the compliments Brian!!!
Delete